sửa chữa tivi lcd

Báo cáo Thực tập : Tìm hiểu và Sửa chữa Tivi
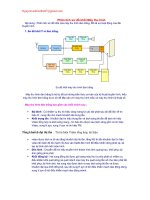
... Chân 1: in. Chân 2: mass. 4 báo cáo thực tập Hà Nội 10- 2005 Báo cáo thực tập: Tìm hiểu và sửa chữa Tivi màu I. Giới thiệu các linh kiện dùng cho máy màu: 1. Điện trở 5 vòng màu: Các thông ... chân điều khiển. II. Các khối cơ bản trong máy màu: 1. Giới thiệu tổng quát: Các khối cơ bản của Tivi JVC: + Khối hộp kênh, trung tần trung : mà số 1. + Khối mạch vi xử lý: mà số 7. + Khối quét...
Ngày tải lên: 15/10/2012, 08:34


Giáo trình thiết kế và sửa chữa tivi docx
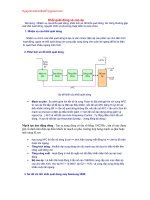
... tín hiệu từ đài phát => Suy ra hiện tượng này là do hỏng bộ kênh hoặc đứt Anten. Hướng sửa chữa : • Kiểm tra điện áp Vcc cho bộ kênh • Kiểm tra điện áp tự điều khuếch AGC có khoảng 6V ... hiện tượng trên hoàn toàn tương tự như bệnh 1, nhưng mức độ hỏng nhẹ hơn, các bước kiểm tra và sửa chữa tương tự Bệnh 1 Nguyenvanbientbd47@gmail.com Khối đồng bộ trong Ti vi Samsung 359R • R1, ... màn ảnh sáng min . Ti vi hỏng trung tần, chỉ còn màn sáng mịn, không có nhiễu. 3. Các bước sửa chữa mạch trung tần. Xác định đúng nguyên nhân là hư hỏng mạch trung tần : dựa vào biểu hiện...
Ngày tải lên: 28/06/2014, 17:20



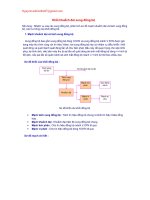
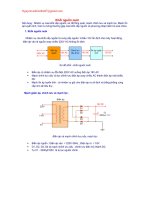
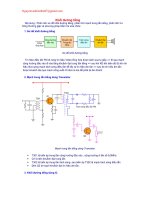

Giáo trình sửa chữa màn hình LCD - Chương1
... perform the assembly procedure of the LCD monitor. Asus MB17SE LCD monitor consists of various subsystems. This section describes the procedures for LCD monitor assembly. In addition, the ... Tighten 2 screws on POWER BOARD SHIELDING. I. MB17SE LCD Monitor Overview Main product features include z 17“ LCD Monitor z Recommended Resolution: 1280*1024 z MB17SE:5 ms (Tr+Tf) ... RESTRICTIONS ON USE OF MATERIALS This manual is only for ASUS authorized service centers to repair ASUS LCD product. The documents are provided as is and no copy, reproduction or transfer shall be made...
Ngày tải lên: 15/11/2012, 16:57

Giáo trình sửa chữa màn hình LCD - Chương2
... perform the assembly procedure of the LCD monitor. Asus MB19TU/SE LCD monitor consists of various subsystems. This section describes the procedures for LCD monitor assembly. In addition, the ... the LCD monitor. Depending on the failures, replace the defective parts accordingly. Asus MB19TU/SE LCD Monitor consists of various subsystems. This section describes the procedures for LCD ... prevent any damages to the LCD Monitor and also select the appropriate tools for disassembly and re-assembly. Make sure all power connection is removed. Be sure that the LCD Monitor is in power...
Ngày tải lên: 15/11/2012, 16:57

Giáo trình sửa chữa màn hình LCD - Chương 3
... 3 - 8 II. LCD Subsystem LCD MODULE The illustrations below show how to remove the LCD panel from the LCD Subsystem. A. Removing Back Cover LCD SUBSYSTEM REMOVAL 1. ... 3 - 5 III. LCD Subsystem LCD MODULE The illustrations below show how to assemble and install the LCD panel of the LCD Subsystem. A. Main Shield MAIN ... the LCD monitor. Be sure to use proper tools described in the previous chapter. SUS MM17T and MM19 SE/TE LCD monitor consist of various subsystem. This section describes the procedures for LCD...
Ngày tải lên: 15/11/2012, 16:57
Giáo trình sửa chữa màn hình LCD - Chương4
... the LCD monitor. Depending on the failures, replace the defective parts accordingly. Asus MW221/201 LCD Monitor consists of various subsystems. This section describes the procedures for LCD ... used for the LCD monitor’s service and repair. Philips-head Screwdriver Use a Philips-head screwdriver to fasten/remove the K- or B-typed screws P/N:N/A Gloves To protect LCD Panel and ... 23 4.2 Panel Subsystem 1. Assemble PANEL FRAME with LCD PANEL 2. Tighten 4 screws on left and right side of PANEL FRAME. 3. Mount LCD SUBSYSTEM with BEZEL. 4. Secure 2 screws on...
Ngày tải lên: 15/11/2012, 16:57

Giáo trình sửa chữa màn hình LCD - Chương5
... the LCD monitor. Depending on the failures, replace the defective parts accordingly. Asus PG191 LCD Monitor consists of various subsystems. This section describes the procedures for LCD ... prevent any damages to the LCD monitor and also select the appropriate tools for disassembly and re-assembly. Make sure all power connection is removed. Be sure that the LCD monitor is in power ... power off status. Prepare soft cloth and sponge as working platform to place LCD monitor horizontally. Hold LCD by the side carefully and DON’T touch or press panel directly. Remove...
Ngày tải lên: 15/11/2012, 16:57

Giáo trình sửa chữa màn hình LCD - Chương6
... 1. Insert LVDS cable carefully and sticker 3 tapes to fix cables. 2. Assemble LCD panel and LCD SHIELDING 38 4.3 Stand Subsystem 1. Combine BASE COVER and BASE BRACKET. ... LCD Monitor Service Guide for L2 (Module) Repair Model: PW191 V1.0 RESTRICTIONS ON USE OF MATERIALS This manual is only for ASUS authorized service centers to repair ASUS LCD ... sides. 4. Locate panel module in BEZEL and press down to fix it. 5. Secure 6 screws on LCD SHIELDING. 1 6 5 4 3 2 4 Back side 35 Shielding 1. Cover POWER...
Ngày tải lên: 15/11/2012, 16:57

Giáo trình sửa chữa màn hình LCD - Chương7
... the LCD monitor. Depending on the failures, replace the defective parts accordingly. Asus PW201 LCD Monitor consists of various subsystems. This section describes the procedures for LCD ... perform the assembly procedure of the LCD monitor. Asus PM201 LCD monitor consists of various subsystems. This section describes the procedures for LCD monitor assembly. In addition, the ... Subsystem 1. Insert LVDS cable carefully and sticker 3 tapes to fix cables. 2. Assemble LCD panel and LCD SHIELDING 23 Main Board 1. Remove all tapes 2. Disconnect key control...
Ngày tải lên: 15/11/2012, 16:57
Bạn có muốn tìm thêm với từ khóa: