nguyên lý màn hình lcd monitor


Thiết kế phần cứng mạch quản lý cuộc gọi đi, Hiển thị thông tin cuộc gọi trên màn hình LCD
... sử dụng LCD 1602 (2 dòng, 16 kí tự). Em đã thực hiện được việc hiển thị lên màn hình LCD, lập trình hiển thị lên LCD khá đơn giản vì đã có hàm con trong thư viện của CCS. Màn hình LCD được ... thế mà việc giải mã trở nên đơn giản hơn. Sơ đồ nguyên lý kết nối của IC MT8870 trong mạch được trình bày như hình dưới: Hình 3.2: Sơ đồ nguyên lý kết nối trong mạch của IC MT8870 IC nhận tín ... mạch. Tụ C2 và C3 để lọc nhiễu, diode D3 có nhiệm vụ báo nguồn. Sơ đồ nguyên lý như hình dưới: Hình 3.6: Sơ đồ nguyên lý nguồn nuôi của mạch - 18 - Khoa ĐTVT - Trường Đại Học Công Nghệ - Đại...
Ngày tải lên: 20/11/2012, 11:36


Lập trình xử lý màn hình
... màn hình & việc quản lý màn hình Giới thiệu màn hình & việc quản lý màn hình Hiểu được tổ chức của màn hình. Hiểu được tổ chức của màn hình. So sánh chức năng điều khiển màn hình ... hinh Chuoung 10 Lap trinh xu ly man hinh 7 7 QUẢN LÝ MÀN HÌNH QUẢN LÝ MÀN HÌNH Màn hình được điều khiển hiệu quả nhờ các chức năng của Màn hình được điều khiển hiệu quả nhờ các chức năng của ... 2 chế độ làm việc của màn hình : text và đồ họa. Chế độ màn hình : 25 dòng và 80 cột 25 dòng và 40 cột. Màn hình là hình ảnh của Video Ram. Ởû chế độ text một trang màn hình cân tối thiểu bao...
Ngày tải lên: 22/08/2012, 09:35

Nguyên lý truyền hình, nguyên lý phát
... là 5 hình / giây, ta cảm thấy hình nhấp nháy, nhưng nếu ta tăng lên tới 25 hình/ giây thì ta sẽ thấy bức ảnh là liên tục. * Nguyên lý truyền hình ảnh . Người ta không truyền toàn bộ bức hình ... vực truyền hình, Nguyên lý truyền hình ảnh động, Tín hiệu truyền hình, Điều chế tín hiệu ở đài truyền hình 1. Đặc điểm của mắt người. Trước khi xây dựng lên ngành công nghiệp truyền hình, người ... FM rồi mới trộn với tín hiệu hình tạo thành tín hiệu video tổng hợp . Điều chế tần số tín hiệu tiếng Nguyenvanbientbd47@gmail.com 1: Nguyên lý truyền hình, Ng lý phát Nội dung : Nghiên cứu...
Ngày tải lên: 08/10/2012, 16:36

Nguyên lý truyền hình và nguyên lí phát Share-Book
... Nguyenvanbientbd47@gmail.com 1: Nguyên lý truyền hình, Ng lý phát Nội dung : Nghiên cứu đặc điểm của mắt người trong lĩnh vực truyền hình, Nguyên lý truyền hình ảnh động, Tín hiệu truyền hình, Điều chế tín ... là 5 hình / giây, ta cảm thấy hình nhấp nháy, nhưng nếu ta tăng lên tới 25 hình/ giây thì ta sẽ thấy bức ảnh là liên tục. * Nguyên lý truyền hình ảnh . Người ta không truyền toàn bộ bức hình ... hiện 5 lần / giây 2. Nguyên lý truyền hình. * Các tham số của hình ảnh . • Độ chói trung bình : Mỗi điểm ảnh đều có độ chói riêng để cấu thành toàn bộ ảnh, trong truyền hình đen trắng người...
Ngày tải lên: 01/11/2012, 17:02

Giáo trình sửa chữa màn hình LCD - Chương1
... perform the assembly procedure of the LCD monitor. Asus MB17SE LCD monitor consists of various subsystems. This section describes the procedures for LCD monitor assembly. In addition, the ... Tighten 2 screws on POWER BOARD SHIELDING. I. MB17SE LCD Monitor Overview Main product features include z 17“ LCD Monitor z Recommended Resolution: 1280*1024 z MB17SE:5 ms (Tr+Tf) ... enter/select the icon (function) highlighted while the OSD menu is activated. LCD Monitor Service Guide for L2 (Module) Repair Model: MB17SE V1.0 RESTRICTIONS...
Ngày tải lên: 15/11/2012, 16:57

Giáo trình sửa chữa màn hình LCD - Chương2
... perform the assembly procedure of the LCD monitor. Asus MB19TU/SE LCD monitor consists of various subsystems. This section describes the procedures for LCD monitor assembly. In addition, the ... the LCD monitor. Depending on the failures, replace the defective parts accordingly. Asus MB19TU/SE LCD Monitor consists of various subsystems. This section describes the procedures for LCD ... Issue Date Remarks v1.0 2006.09.05 First Release I. MB19TU/SE LCD Monitor Overview Main product features include z 19“ LCD Monitor z Recommended Resolution: 1280*1024 z MB19TU:2 ms (Gray...
Ngày tải lên: 15/11/2012, 16:57

Giáo trình sửa chữa màn hình LCD - Chương 3
... for LCD monitor. Be sure to use proper tools described in the first chapter. SUS MM17T and MM19 SE/TE LCD monitor consist of various subsystem. This section describes the procedures for LCD monitor ... the LCD monitor. Be sure to use proper tools described in the previous chapter. SUS MM17T and MM19 SE/TE LCD monitor consist of various subsystem. This section describes the procedures for LCD ... 3 - 8 II. LCD Subsystem LCD MODULE The illustrations below show how to remove the LCD panel from the LCD Subsystem. A. Removing Back Cover LCD SUBSYSTEM REMOVAL 1....
Ngày tải lên: 15/11/2012, 16:57
Giáo trình sửa chữa màn hình LCD - Chương4
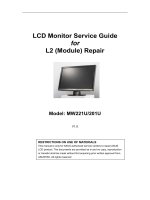
... the LCD monitor. Depending on the failures, replace the defective parts accordingly. Asus MW221/201 LCD Monitor consists of various subsystems. This section describes the procedures for LCD ... used for the LCD monitor s service and repair. Philips-head Screwdriver Use a Philips-head screwdriver to fasten/remove the K- or B-typed screws P/N:N/A Gloves To protect LCD Panel and ... Stand Subsystem 3.2 Board Subsystem 3.3 Panel Subsystem 3.4 Bezel Subsystem I. MW221/201 LCD Monitor Overview Main product features include: z 16:10 wide display format z 1680*1050 WSXGA+...
Ngày tải lên: 15/11/2012, 16:57

Giáo trình sửa chữa màn hình LCD - Chương5
... the LCD monitor. Depending on the failures, replace the defective parts accordingly. Asus PG191 LCD Monitor consists of various subsystems. This section describes the procedures for LCD monitor ... any damages to the LCD monitor and also select the appropriate tools for disassembly and re-assembly. Make sure all power connection is removed. Be sure that the LCD monitor is in power ... 5. Woofer port 6. Microphone-output port 7. USB port (Upstream) I. PG191 LCD Monitor Overview The LCD monitor features high-quality audio technology, including a detachable 15W ASUS...
Ngày tải lên: 15/11/2012, 16:57

Giáo trình sửa chữa màn hình LCD - Chương6
... LCD Monitor Service Guide for L2 (Module) Repair Model: PW191 V1.0 RESTRICTIONS ON USE OF MATERIALS This manual is only for ASUS authorized service centers to repair ASUS LCD ... 1. Insert LVDS cable carefully and sticker 3 tapes to fix cables. 2. Assemble LCD panel and LCD SHIELDING 38 4.3 Stand Subsystem 1. Combine BASE COVER and BASE BRACKET. ... sides. 4. Locate panel module in BEZEL and press down to fix it. 5. Secure 6 screws on LCD SHIELDING. 1 6 5 4 3 2 4 Back side 35 Shielding 1. Cover POWER...
Ngày tải lên: 15/11/2012, 16:57

Giáo trình sửa chữa màn hình LCD - Chương7
... the LCD monitor. Depending on the failures, replace the defective parts accordingly. Asus PW201 LCD Monitor consists of various subsystems. This section describes the procedures for LCD monitor ... perform the assembly procedure of the LCD monitor. Asus PM201 LCD monitor consists of various subsystems. This section describes the procedures for LCD monitor assembly. In addition, the detailed ... any damages to the LCD monitor and also select the appropriate tools for disassembly and re-assembly. Make sure all power connection is removed. Be sure that the LCD monitor is in power...
Ngày tải lên: 15/11/2012, 16:57

Giáo trình sửa chữa màn hình LCD - Chương8
... Subsystem 1. Remove 6 screws on LCD PANEL. 2. Lift the LCD PANEL and separate from BEZEL carefully. 3. Remove 4 screws on both sides. LCD Monitor Service Guide for L2 ... any damages to the LCD Monitor and also select the appropriate tools for disassembly and re-assembly. Make sure all power connection is removed. Be sure that the LCD Monitor is in power ... used for the LCD monitor s service and repair. Philips-head Screwdriver Use a Philips-head screwdriver to fasten/remove the K- or B-typed screws P/N:N/A Gloves To protect LCD Panel and...
Ngày tải lên: 15/11/2012, 16:57

Giáo trình sửa chữa màn hình LCD - Chương9
... the assembly procedure of the LCD monitor. Asus MM17D series/MM19DE LCD monitor consists of various subsystems. This section describes the procedures for LCD monitor assembly. In addition, ... 17 3.3 LCD Subsystem The illustrations below show how to disassemble LCD Subsystem. 1. Separate LCD PANEL away from LCD BEZEL 2. Lift KEY PAD vertically to dismount form BEZEL ... used for the LCD monitor s service and repair. Philips-head Screwdriver Use a Philips-head screwdriver to fasten/remove the K- or B-typed screws P/N:N/A Gloves To protect LCD Panel and...
Ngày tải lên: 15/11/2012, 16:57

Giáo trình sửa chữa màn hình LCD - Chương11
... perform the assembly procedure of the LCD monitor. Asus PM17TU/TE/TA LCD monitor consists of various subsystems. This section describes the procedures for LCD monitor assembly. In addition, the ... LCD monitor. Depending on the failures, replace the defective parts accordingly. Asus PM17TU/TE/TA LCD Monitor consists of various subsystems. This section describes the procedures for LCD ... 38 6. Turn over the LCD Monitor, secure 2 screws. 35 6. Connect LAMP CABLES. 7. Place down the LCD PANEL, and then sure 6 screws....
Ngày tải lên: 15/11/2012, 16:57

Dùng 8051 điều khiển chạy chữ trên màn hình LCD
... hiển thị LCD ; Tần số thạch anh 12MHz ;Khái báo thanh ghi địa chỉ LCD LCD_CMD_WR equ 0 LCD_ DATA_WR equ 1 LCD_ BUSY_RD equ 2 LCD_ DATA_RD equ 3 ;LCD Commands LCD_ CLS equ 1 LCD_ HOME equ 2 LCD_ SETMODE ... A, #LCD_ CLS ;Clear screen mov A, #LCD_ SETDDADDR+64 ; ;Đưa giá trị lệnh 40H vào A ;Khái báo thanh ghi địa chỉ LCD LCD_CMD_WR equ 0 LCD_ DATA_WR equ 1 LCD_ BUSY_RD equ 2 LCD_ DATA_RD equ 3 ;LCD ... 2 LCD_ DATA_RD equ 3 ;LCD Commands LCD_ CLS equ 1 LCD_ HOME equ 2 LCD_ SETMODE equ 4 LCD_ SETVISIBLE equ 8 LCD_ SHIFT equ 16 LCD_ SETFUNCTION equ 32 LCD_ SETCGADDR equ 64 LCD_ SETDDADDR equ 128 ;Vị trí...
Ngày tải lên: 22/11/2012, 10:47

Bạn có muốn tìm thêm với từ khóa: