Sử dụng photoshop cs5 part 16 pdf
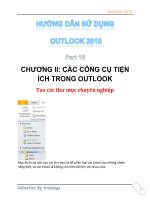
Tài liệu Hướng dẫn sử dụng Outlook 2010 part 16 pdf
... hành Windows mà MS Outlook 2010 có vị trí lưu template khác nhau. + Windows XP: thư mục Documents And SettingsTên tài khoảnApplication DataMicrosoftTemplates Outlook 2010 1 CHƯƠNG ... Folder. 3 Chọn thư mục bạn muốn lưu 4 Ok Tạo quy tắc nhận mail e. Cách thức tạo và sử dụng email mẫu Nếu sử dụng một dạng email thường ngày được gởi lặp đi lặp lại cùng một...
Ngày tải lên: 15/12/2013, 05:15
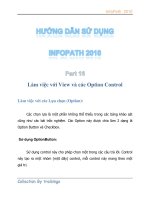
Tài liệu Hướng dẫn sử dụng InfoPath 2010 part 16 pdf
... Sử dụng OptionButton: Sử dụng control này cho phép chọn một trong các câu trả lời. Control này tạo ra một nhóm (một dãy) control, mỗi control này mang theo một giá trị. InfoPath 2010 ... Choice Hính 85: các Choice Section và Choice Group Hính 86: sử dụng Choice Section/Choice Group trên Filler InfoPath 2010 Hính 84: thuộc tình Data của Optoin Butto...
Ngày tải lên: 26/01/2014, 16:20

Hướng dẫn sử dụng Photoshop CS5 - Phần 16: xóa đối tượng bất kỳ khỏi bức ảnh docx
... video hướng dẫn) . - Sử dụng Lasso Tool để copy và paste các phần hình ảnh khá tương đương với nhau. Tính năng Content-Aware Fill trong Photoshop: Một tính năng khác nữa của Photoshop CS5 ... vào bất kỳ phần nào trên bức ảnh để lấy mẫu. - Khi đang tiến hành lấy mẫu, hoạt động của con trỏ chuột luôn ở trạng thái Aligned. - Tắt hoặc bỏ chế độ Alig...
Ngày tải lên: 21/06/2014, 04:20

Hướng dẫn sử dụng Photoshop CS5 - Phần 28 pdf
... Small, Soft - Edge round brush, và nhấn vào phần dưới của hình tròn để tạo thêm 1 điểm nữa như hình dưới: Nhấn và giữ phím Ctrl (Windows) hoặc Command (Mac) và chọn trực tiếp phần Preview ... trái: Tiếp tục, chọn biểu tượng New Layer để tạo thêm 1 lớp mới: Và sử dụng công cụ Brush Tool: Khi đã hoàn thành phần cơ bản của hình bong bóng, hãy lưu lại dưới dạng Brush. Mở...
Ngày tải lên: 21/06/2014, 04:20

Sử dụng photoshop cs5 part 2 pdf
... ptg 12 Chapter 1 Before synchronizing the color settings via Bridge, make sure you’ve chosen the proper settings in Photoshop (see the preceding two pages). To ... Creative Suite applications using Bridge: 1. On the Application bar in Photoshop, click the Launch Bridge button. 2. In Bridge, choose Edit > Creative Suite Color Settings (Ctrl-Shift-K/Cmd-Shift-K). ... (Ctrl-Shif...
Ngày tải lên: 02/07/2014, 06:20

Sử dụng photoshop cs5 part 6 pdf
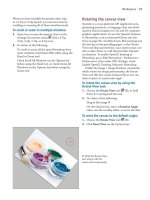
... into Camera Raw (to apply corrections before open- ing the les into Photoshop) , see pages 62 63 . To open files from Bridge into Photoshop: 1. In the Content panel, display the thumbnail for the ... thumbnail. ➤ To open an image into Photoshop from Review mode, right-click it and choose Open from the context menu. GETTING TO PHOTOSHOP QUICKLY If Photoshop was the last Creativ...
Ngày tải lên: 02/07/2014, 06:20
Sử dụng photoshop cs5 part 10 pdf
... format in Photoshop. Note: Don’t confuse the raw les that a camera produces with Photoshop Raw, which is one of the choices on the Format menu in the File > Save and Save As dialogs in Photoshop. * ... converted by Camera Raw will be better equipped to withstand those Photoshop edits. Noise reduction and sharpening: Not to knock Photoshop, but the noise reduction and sharp...
Ngày tải lên: 02/07/2014, 06:20
Sử dụng photoshop cs5 part 16 pdf
... To enable OpenGL drawing in Photoshop, go to Edit /Photoshop > Preferences > Performance, then under GPU Settings, check Enable OpenGL Drawing. Relaunch Photoshop. Unlike the Image > ... environment in Photoshop, the next step is to save theme-related workspaces for dierent kinds of tasks. is will shorten your setup time when you begin your work sessions. A In Photoshop...
Ngày tải lên: 02/07/2014, 06:20

Sử dụng photoshop cs5 part 20 pdf
... marquee over the part of the image you want to keep. A 3. On the Options bar, do the following: If the document contains image layers, click Cropped Area: Delete to have Photoshop delete ... the Perspective option for the Crop tool. ➤ To specify a default Image Interpolation method for Photoshop features, such as the Crop tool, see page 386. A With the Crop tool, drag a marquee...
Ngày tải lên: 02/07/2014, 06:20

Sử dụng photoshop cs5 part 21 pdf
... l e > S a v e A s d i a l o g , c h e c k Layers, and as the fi le Format, choose Photoshop, Photoshop PDF, Large Document Format (see the sidebar on page 22), or TIFF. The formats that ... the layer or layers you want to work on before editing your document! is signals to Photoshop which part of your document you want to change. When a layer or layer group is selected, it ....
Ngày tải lên: 02/07/2014, 06:20
Sử dụng photoshop cs5 part 43 pdf
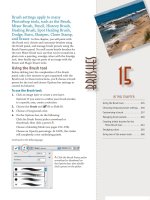
... . . . . . .265 Using two of the eraser tools . . . . . .266 15 Brush settings apply to many Photoshop tools, such as the Brush, Mixer Brush, Pencil, History Brush, Healing Brush, Spot Healing ... to transform a photo into a painting, smudge colors with the Smudge tool, then nally zap out parts of an image with the Eraser and Magic Eraser tools. Using the Brush tool Before delvi...
Ngày tải lên: 02/07/2014, 06:20
Sử dụng photoshop cs5 part 49 pdf
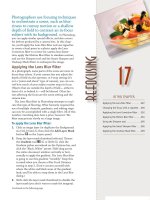
... Adjustments panel, move the white Output Levels slider to the left to darken all but the masked part of the image. A 6. Optional: To change the location of the darken- ing vignette, on the Layers ... advantage of this method is that you can modify the lter settings and edit the mask to change which part of the image is in focus. To create an area of focus (a vignette) by using a mas...
Ngày tải lên: 02/07/2014, 06:20
Sử dụng photoshop cs5 part 61 pdf
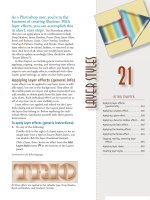
... . . . . . . .366 21 As a Photoshop user, you’re in the business of creating illusions. With layer eects, you can accomplish this in short, easy steps. e Photoshop eects that you can ... only way to restore the factory default settings to all layer effects is by resetting all the Photoshop preferences. Hold down Ctrl-Alt-Shift/ Cmd-Option-Shift while relaunching the progra...
Ngày tải lên: 02/07/2014, 06:20

Sử dụng photoshop cs5 part 70 pdf
... dialog and return to the Print dialog for Photoshop. Now you’re ready to choose print settings for Photoshop (see page 408). In Photoshop CS5, all the necessary printing options ... Choose settings in the Print dialog in Photoshop. WHY WE LET PHOTOSHOP MANAGE COLORS From the Color Handling menu of the Print dialog, you can choose to let Photoshop or your printing...
Ngày tải lên: 02/07/2014, 06:21

Sử dụng photoshop cs5 part 72 pdf
... saved in this format. Photoshop will create one of two kinds of PDF les, depending on which preset you choose in the Save Adobe PDF dialog. e default PDF format, Photoshop PDF, preserves image, ... per le. To create a Photoshop PDF le, you need to check Preserve Photoshop Editing Capabilities in the Save Adobe PDF dialog. is type of PDF can be opened only in...
Ngày tải lên: 02/07/2014, 06:21
- hướng dẫn sử dụng photoshop cs5 phần 16
- tài liệu hướng dẫn sử dụng outlook 2010 part 16 pdf
- hướng dẫn sử dụng photoshop cs5 pdf
- hướng dẫn sử dụng photoshop cs5 full pdf
- cách sử dụng photoshop cs5 pdf
- hướng dẫn sử dụng photoshop cs6 tiếng việt pdf
- hướng dẫn sử dụng photoshop cs5 toàn tập
- hướng dẫn sử dụng photoshop cs5 tiếng việt