Learning AutoCAD 2010, Volume 2 phần 9 doc

Learning AutoCAD 2010, Volume 1 phần 2 doc
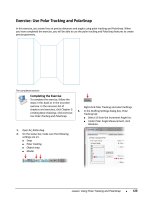
... point in the drawing window for the first point (1) . ■ Enter the polar coordinate @2& lt;45 (2) . Press ENTER. ■ Enter the polar coordinate @2& lt ;13 5 (3). Press ENTER. ■ Enter c for the ... ENTER. ■ Drag to < 90, and enter 1. 5 and press ENTER. ■ Drag to < 18 0, and enter 1 and press ENTER. ■ Drag to < 90, and enter 1 and press ENTER. ■ Drag to < 18 0, and enter...
Ngày tải lên: 09/08/2014, 11:20

Learning AutoCAD 2010, Volume 1 phần 3 docx
... line. 10 . To draw a line perpendicular to the last: ■ Drag the cursor upward making sure that the angle field displays 90 degrees. ■ Enter 10 0. Press ENTER. 11 . To draw ... Press ENTER. ■ To specify the radius of the polygon circle, enter 1. 5. Press ENTER. 11 0 ■ Chapter 2: Creating Basic Drawings 3. SHIFT+right-click and select the object snap...
Ngày tải lên: 09/08/2014, 11:20
Learning AutoCAD 2010, Volume 1 phần 4 docx
... with Units ■ 14 7 11 . For the next point: ■ Move the cursor to the left. ■ Enter 44 '-5". Press TAB. ■ Enter 18 0. Press TAB. ■ Click anywhere in the drawing. 12 . Right-click ... Introduction in Volume 1. 14 6 ■ Chapter 2: Creating Basic Drawings 4. For the next point: ■ Move the cursor down and to the right. ■ Enter 2&apos ;4. 25. Press TAB....
Ngày tải lên: 09/08/2014, 11:20
Learning AutoCAD 2010, Volume 1 phần 6 doc
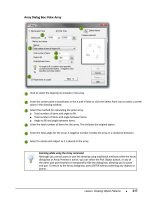
... 2 21 Practice Exercise: Creating an Array of Objects In this practice exercise, you draw a 1 x 1 rectangle and create an array using the Polar and Rectangular array options. 1. ... Introduction in Volume 1. Lesson: Creating Object Patterns ■ 219 Procedure: Creating a Polar Array of Objects The following steps are an overview of creating polar arrays....
Ngày tải lên: 09/08/2014, 11:20

Learning AutoCAD 2010, Volume 1 phần 9 pot
... Objects 10 . To remove the construction lines: ■ Start the Erase command. ■ Select the lines indicated in the following image. Press ENTER. 11 . Your completed drawing. 12 . ... (1) . ■ Select the object to join (2). ■ Press ENTER to complete the command. 5. To Join the arc segments and close them. Method 1: ■ Begin the Join command. ■ Select one...
Ngày tải lên: 09/08/2014, 11:20

Learning AutoCAD 2010, Volume 2 phần 1 potx
... Content 21 9 Lesson: Using Blocks 22 0 About Blocks 22 1 How Blocks Behave 22 4 Creating Blocks 22 6 Inserting Blocks 23 2 Exercise: Create and Insert Blocks 23 8 Lesson: Working with DesignCenter 24 1 Using ... Objects 25 9 Lesson: Working with Polylines 26 0 About Polylines 26 1 Creating Polylines 26 2 Editing Polylines 26 4 Exercise: Create and Modify Polylines 26 8 Les...
Ngày tải lên: 09/08/2014, 11:20

Learning AutoCAD 2010, Volume 2 phần 2 pdf
... Challenge Exercise: Mechanical ■ 39 2. Create a new layout configuration with the following settings: ■ DWF6 ePlot.pc3 ■ ISO A3 ( 420 x 29 7) ■ Three viewports that do not show on the ... changed in Layout2: ■ Click the Model tab. Confirm that the furniture color remained brown. ■ Click the Layout1 tab. Notice that the furniture color remained brown. ■ Click the Layout2 tab. Con...
Ngày tải lên: 09/08/2014, 11:20

Learning AutoCAD 2010, Volume 2 phần 3 pot
... are 30 0 mm tall as shown in the illustration: ■ 22 1 through 22 4 - SLEEPING QUARTERS ■ 20 1 - READY ROOM ■ 20 2 & 20 4 - LOCKER ROOM ■ 20 3 - EXERCISE ROOM ■ 20 5 - DINING ROOM ■ 20 6 - KITCHEN ■ 20 7 ... command. 2. Select the first line segment (1). 3. Select the second line segment (2) . 4. Click to position the dimension (3) . Lesson: Cre...
Ngày tải lên: 09/08/2014, 11:20

Learning AutoCAD 2010, Volume 2 phần 4 potx
... units, if your final plot scale is 1 :40 , set DIMSCALE to 40 . For imperial units, if your final plot scale is 1 /4& quot;=1', set DIMSCALE to 48 ( 12 / .25 = 48 ). DIMSCALE will multiply the dimension ... command. 2. Select an arc or circle (1). 3. Specify a center location override (2) . 4. Specify a dimension line location (3). 5. Specify the jog locatio...
Ngày tải lên: 09/08/2014, 11:20

Learning AutoCAD 2010, Volume 2 phần 5 pdf
... 168 ■ Chapter 8: Dimensioning 2. Select a dimension (2) . Press ENTER. 3. Enter an oblique angle (i.e. 80). 1 42 ■ Chapter 8: Dimensioning New Dimension ... Display alternate units option is turned off in the Standard and ISO - 25 dimension styles. Lesson: Using Multileaders ■ 159 3. To assign the Content type: ■ Click the Content tab. ■ .....
Ngày tải lên: 09/08/2014, 11:20
Learning AutoCAD 2010, Volume 2 phần 6 pptx
... supported by AutoCAD LT. If you attempt this exercise in AutoCAD LT, you will need to use solid fills instead of gradient fills. The Hatch and Gradient dialog box is named the Hatch dialog box in AutoCAD ... 15. Zoom to display your entire drawing. 16. Close all files. Do not save. Lesson: Hatching Objects ■ 20 3 17. Click Add: Pick Points. Select...
Ngày tải lên: 09/08/2014, 11:20

Learning AutoCAD 2010, Volume 2 phần 7 docx
... (1), set your scale factor (2) , and your rotation angle (3). The default rotation direction is CCW. 21 8 ■ Chapter 9: Hatching Objects Lesson: Using Blocks ■ 22 7 Block Definition ... Enter 12 for the text height in the Style panel of the Text editor shown in the ribbon. ■ Enter COUPLER. ■ Click Close Text Editor. 11. Close all files. Do not save. 22...
Ngày tải lên: 09/08/2014, 11:20
Learning AutoCAD 2010, Volume 2 phần 8 pptx
... point of the ellipse and then one endpoint for each axis. 25 8 ■ Chapter 10: Working with Reusable Content Lesson: Creating Ellipses ■ 28 7 Procedure: Creating an Elliptical Arc The following ... Command line blank, select the spline. 2. Select a grip control point (1) and drag it to a new location (2) and click. 26 4 ■ Chapter 11: Creating Additional Dr...
Ngày tải lên: 09/08/2014, 11:20

Learning AutoCAD 2010, Volume 2 phần 9 doc
... ■ 3 09 6. Create a table showing the following Room Schedule data: ■ NUMBER - NAME - AREA ■ 22 1 - SLEEPING QUARTERS - 21 m2 ■ 20 1 - READY ROOM - 36 m2 ■ 20 2 - LOCKER ROOM - 14 m2 ■ 20 3 - ... 14 m2 ■ 20 3 - EXERCISE ROOM - 23 m2 ■ 20 5 - DINING ROOM - 24 m2 ■ 20 6 - KITCHEN - 6 m2 ■ 20 7 - MEN'S TOILET ROOM - 11 m2 ■ 20 8 - WOMEN'S TOILET ROOM - 14 m2...
Ngày tải lên: 09/08/2014, 11:20

Learning AutoCAD 2010, Volume 2 phần 10 ppsx
... where you can choose a plot style to edit or add a new plot style. 3 62 ■ Appendix 3 32 ■ Chapter 12: Plotting Your Drawings 2. When prompted to specify a window for printing, drag a window ... the drawing plots according to the default printer settings. 346 ■ Chapter 12: Plotting Your Drawings 326 ■ Chapter 12: Plotting Your Drawings 8. To set a current page setup: ■ In th...
Ngày tải lên: 09/08/2014, 11:20