Sử dụng photoshop cs5 part 18 pptx

Tài liệu Hướng dẫn sử dụng excel 2010 part 18 pptx
... dữ liệu sau đây. Nó là dữ liệu của những cửa hàng cho thuê băng video: Excel 2010 17 Excel 2010 14 1.3. Tạo một PivotChart Một PivotChart chẳng có gì khác hơn là một biểu đồ Excel, ... chứa dữ liệu mà bạn muốn tạo PivotTable. Rồi, bạn nhấn nút PivotTable nằm trong nhóm Insert của thanh Ribbon: Excel sẽ hiển thị hộp thoại Create PivotTable như hình sau đây:...
Ngày tải lên: 24/12/2013, 12:18

Tài liệu Hướng dẫn sử dụng word 2010 part 18 pptx
... là nó chưa được khai báo) thì phải thực hiện các bước sau: Word 2010 1 Chương 5: Hỗ trợ xử lý trong Word 2010 In tài liệu Word Định dạng trang in Mỗi khi tạo file mới, trong cửa sổ ... Word 2010 4 - Copies: chọn số bản in - Printer : chọn tên máy in tương ứng đã được cài đặt trong Windows. Nếu máy in đang sử dụng không có tên trong danh ... dùng,...
Ngày tải lên: 24/12/2013, 13:15

Tài liệu Hướng dẫn sử dụng Visio 2010 part 18 pptx
... Visio 2010 Hình V-3.4 : thông tin về hình ảnh trong thư viện. MS Visio 2010 tích hợp MS Excel 2010 để sử dụng biểu đồ.Nếu máy tính bạn chưa cài đặt MS Excel 2010, MS Visio 2010 sẽ sử ... 2010 sẽ sử dụng chương trình Microsoft Graph để thay thế. Khi bạn tạo mới một biểu đồ trên Visio, bạn có thể sửa biểu đồ đó trên MS Excel ,tuy nhiên dữ liệu được...
Ngày tải lên: 24/12/2013, 15:15

Hướng dẫn sử dụng Photoshop CS5 - Phần 18: Tạo hiệu ứng ảnh lồng nhau pot
... chỉ định hiệu ứng sẽ “xuất phát” từ vị trí nào trong vùng chọn: Hướng dẫn sử dụng Photoshop CS5 - Phần 18: Tạo hiệu ứng ảnh lồng nhau Trong phần tiếp theo của loạt bài hướng dẫn về Photoshop, ... bản để tạo hiệu ứng ảnh lồng nhau. Mục đích chính của chúng ta là hướng sự tập trung của người xem vào đối tượng chính, sau khi được chỉnh...
Ngày tải lên: 21/06/2014, 04:20

Sử dụng photoshop cs5 part 1 ppsx
... icon yet, open the Adobe Photoshop CS5 folder in the Applications folder, then drag the Adobe Photoshop CS5 application icon into the Dock.) Open the Adobe Photoshop CS5 folder in the Applications ... . . . . . . . 14 Changing color profi les . . . . . . . . . . 16 1 Welcome to Photoshop! In this chap- ter, you’ll launch the application and familiarize yourself w...
Ngày tải lên: 02/07/2014, 06:20

Sử dụng photoshop cs5 part 2 pdf
... ptg 12 Chapter 1 Before synchronizing the color settings via Bridge, make sure you’ve chosen the proper settings in Photoshop (see the preceding two pages). To ... Creative Suite applications using Bridge: 1. On the Application bar in Photoshop, click the Launch Bridge button. 2. In Bridge, choose Edit > Creative Suite Color Settings (Ctrl-Shift-K/Cmd-Shift-K). ... (Ctrl-Shif...
Ngày tải lên: 02/07/2014, 06:20

Sử dụng photoshop cs5 part 3 pps
... ppi 13 x 20 16 x 22 17 x 24 18 x 28 30 0 ppi 7 x 10 8 x 11 8 x 13 9 x 14 * ese print sizes are approximate. For a more exact list- ing, search the Web for “megapixels to print size chart.” PHOTOSHOP ... levels of the tonal spectrum. Photoshop can process les that are in 8, 16, or 32 Bits/Channel mode. All Photoshop commands are available for 8-bit les. Most Photoshop com- ma...
Ngày tải lên: 02/07/2014, 06:20

Sử dụng photoshop cs5 part 4 pps
... another dialog may appear. For the TIFF format, see page 41 7; for EPS, see pages 41 8 41 9; or for PDF, see page 42 0. For other formats, see Photoshop Help. ➤ If you don’t change the le name or ... layers, read about the TIFF, EPS,and PDF formats on pages 41 7 42 0. Or for Web output, read about the GIF and JPEG formats on pages 42 1 42 6. A i s i s t h e S a v e A s d i...
Ngày tải lên: 02/07/2014, 06:20

Sử dụng photoshop cs5 part 5 docx
... . . . 51 Creating and using collections . . . . . 52 Exporting the Bridge cache . . . . . . . 54 Assigning keywords to fi les . . . . . . . 55 Opening PDF and Illustrator fi les . . . . 56 Responding ... Application bar in Photoshop, click the Launch Bridge button (Ctrl-Alt-O/Cmd-Option-O). A In Windows, click the Start button, choose All Programs, then click Adobe Bridge CS5. In...
Ngày tải lên: 02/07/2014, 06:20

Sử dụng photoshop cs5 part 7 pptx
... dialog, A enter a Name for the workspace, check Save Window Location as Part of Workspace and/or Save Sort Order as Part of Workspace (both are optional), then click Save. Note: Your new workspace ... go to Edit/Adobe Bridge CS5 > Preferences > umbnails and uncheck Show Tooltips. ➤ You can assign custom names to the label cate- gories in Edit/Adobe Bridge CS5 > Prefer...
Ngày tải lên: 02/07/2014, 06:20

Sử dụng photoshop cs5 part 8 pptx
... missing from a collection, click Fix. B Drag thumbnails to a nonsmart collection listing. ptg 48 Chapter 3 Using thumbnail stacks Before learning about stacks, you need to know ... s u c h a s l a n d s c a p e s o r portraits, shots of the same subject, shots taken with a particular camera setting, etc. is is easy, too. To group thumbnails into a stack: 1. Shift...
Ngày tải lên: 02/07/2014, 06:20
Sử dụng photoshop cs5 part 18 pptx
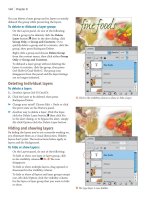
... or more layers in a Photoshop image into a Smart Object, or auto- matically when you place an Illustrator or PDF le, another Photoshop le, or a Camera Raw le into a Photoshop document. Double-click ... Photoshop interface, and the possibilities are in- nite. e presets on this panel are available for all Photoshop documents. Say, for example, you frequently resize and crop i...
Ngày tải lên: 02/07/2014, 06:20

Sử dụng photoshop cs5 part 19 pptx
... this via the Image Size command in Photoshop. To change the resolution of a digital photo for print output (low res/large dimensions): 1. With the le open in Photoshop, choose Image > Image ... Interpolation method for Photoshop features, such as the Image Size dialog, see page 386. JPEGS FROM BRIDGE TO CAMERA RAW From Bridge, you can open JPEG fi les into Photoshop by way of...
Ngày tải lên: 02/07/2014, 06:20
Sử dụng photoshop cs5 part 22 pptx
... tool or hold down V to spring-load the tool. 3. Drag in the document window. A–B If you move part of the layer or layers outside the canvas area, don’t worry — those pixels will save with ... umbnails, or Large umbnails. Note: Turning o thumb- nails by choosing No umbnails can help boost Photoshop s performance, but frankly, we nd it pretty darn hard to work without them. Clip u...
Ngày tải lên: 02/07/2014, 06:20
Sử dụng photoshop cs5 part 35 pptx
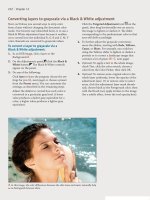
... described in the remaining steps. Adjust the sliders to control how each color is converted to a particular gray level. A lower value produces a darker gray equivalent for a color; a higher value ... photogra- phy, colors help to defi ne spatial and shape rela- tionships and draw our attention to specifi c parts of a scene. When converting an image to gray- scale, think about how you want...
Ngày tải lên: 02/07/2014, 06:20
- hướng dẫn sử dụng photoshop cs5 toàn tập
- hướng dẫn sử dụng photoshop cs5 tiếng việt
- video hướng dẫn sử dụng photoshop cs5 toàn tập
- hướng dẫn sử dụng photoshop cs5 toàn tập pdf
- tài liệu hướng dẫn sử dụng word 2010 part 16 pptx
- tài liệu hướng dẫn sử dụng word 2010 part 20 pptx
- tài liệu hướng dẫn sử dụng word 2010 part 25 pptx
- cách sử dụng photoshop cs5 làm mịn da